Hello Nomsters!
I hope everyone enjoyed January, we definitely got our fair share of winter weather alerts. Anyway, just wanted to update everyone on Nightly Noms! We've been testing out new items in the kitchen, which has resulted in us offering Banana Blondies and S'mores cookies as February 2nd delivery options. The Banana Blondies are probably the better choice for those seeking a sweet treat that doesn't involve chocolate, moist and gooey, these blondies have the delicious flavor of bananas in bar form. Similarly, the S'more cookies pack a punch for those looking for the campfire combo without the mess. Each cookie is filled with chocolate chips, marshmallows, and graham cracker pieces for a delicious treat.
Remember, Nightly Noms not only bakes for the weekly delivery service, but we also offer "catering." So, if you're looking to have a Valentine's day soiree, but don't want to bake, just email us and we'll take on the challenge! Or, if you want a dozen cookies, muffins, or S'mores bars for a birthday party or just to nibble on, email us and we can do side orders that can be picked up/dropped off on whatever day you want them! The possibilities are endless (and tasty).
Finally, we'd love if you'd join the Georgetown Foodie+Nightly Noms Relay for Life team! It's a great opportunity to get involved with Nightly Noms and our fundraisers and events are sure to be tasty! So sign up here, and we'll be sure to invite you to our first event, which will be a "Noms with Nightly Noms" event to show our appreciation to our new team members!
Anywho, look out for some restaurant reviews in the near future, and keep an eye on the twitter and facebook for east "put togethers" as meals/snacks!
-gtown foodie
Tuesday, February 1, 2011
Sunday, January 23, 2011
Restaurant Week Feature: Decadent Brunch @ Co Co. Sala
Hello Nomsters,
 As most of you know, this past week was DC's Restaurant Week, which means tantalizingly tasty 3- course meals for lunch ($20.11) and dinner ($35.11) at many of DC's finest restaurants. Of course living on a typical college budget, you don't normally want to spend more than needed on a meal, but a little self indulgence never hurt anyone and my roommates and I decide to partake by making a reservation at Co Co. Sala, a chocolate bar and restaurant on F. street and 10th (near the Verizon Center). Co Co. Sala was one of the few restaurants that was offering a brunch restaurant week special, and after perusing the menu and seeing items like "French Toast S'mores" and "Crispy Creole Crabcake" as options, it was hard to not run to the cutesy chocolate lounge.
 Arriving at Co Co. Sala for our 11:30 reservation, we were seated in the chocolate and pink accented colored lounge to be handed our menus for the Restaurant Week Special. Needless to say, we couldn't go wrong with our options. Each of us started with the Amuse Bouche of the Day, which was a small artichoke tart with tomato confit. The tart was perfectly warm and the crust had an excellent taste, just a little sweetness to offset the taste of the artichoke. Following our tarts, Sarah favored a more savory entree, so she ordered the Aztec Cheese Enchilada with an avocado, guava, and fennel salad with chocolate ganache and guava-lime vinaigrette. Both Gina and I opted for the ultimate indulgence and ordered the "French Toast S'mores" as our brunch entree. After having the well-presented plate placed in front of me and taking my first bite, all I could think was "yum." The french toast was cinnamon brioche stuffed with melted marshmallows and warm dark chocolate, a graham shortbread layered with mousse and warm bananas in caramel sauce accompanied the entree. The french toast literally melted in your mouth as the flavors of each component melded together. I would order this item again in a heartbeat, and as an a la carte option you can experience the deliciousness for about $12. By the last couple of bites, both Gina and I were struggling, but there was no way we would leave a piece on our plate. Completely satisfied by each of our meals, our sever cleared our plates as we took a breath and prepared ourselves for dessert....yes, I know what you're thinking, "who could even contemplate dessert after all of that?!"
 Both Sarah and I ordered the Onyx, a vanilla creme brulee encased in dark chocolate mousse with salted caramel on top, basically chocolate overload. The mousse was perfectly smooth and the creme brulee did an excellent job of preventing us from going into a chocolate overdose. Gina ordered the Stolen Heart, which was a white chocolate strawberry mousse with chocolate crispy pearls; naturally, all of these desserts found their way into our already fulls selves. We barely ate the rest of the day.
Co Co. Sala is a great place for brunch or dessert, they also offer dinner too (don't worry, not everything has chocolate in it!). Although some of the items are a little pricey, the brunch was definitely worth the commute and price. The presentation on each dish was flawless, and the overall tastes definitely give Co Co. Sala an edge over other restaurant's desserts. While I would definitely order the French Toast S'mores again, the Breakfast Flatbread looked like a pretty great savory option also. I may pass on the mousse though and opt for the PB Cheesecake instead, but that may have just been because I was coming out of a food coma from the french toast. This restaurant is great for dessert and drinks out with the girls (they offer a variety of cocktails and hot cocoas) or for a date. Either way you'll swoon for the flavors Co Co. Sala offers. They also have a "Chocolate Boutique" in case you was a box of chocolates to take home!

MENU
929 F STREET NW,
WASHINGTON, DC 20004
P 202.347.4265
Transport:
1. g'town ->union station circulator, get off at about K st. and 11th, walk to F and 10th
2. Any train to Metro Center, walk to F and 10th
 As most of you know, this past week was DC's Restaurant Week, which means tantalizingly tasty 3- course meals for lunch ($20.11) and dinner ($35.11) at many of DC's finest restaurants. Of course living on a typical college budget, you don't normally want to spend more than needed on a meal, but a little self indulgence never hurt anyone and my roommates and I decide to partake by making a reservation at Co Co. Sala, a chocolate bar and restaurant on F. street and 10th (near the Verizon Center). Co Co. Sala was one of the few restaurants that was offering a brunch restaurant week special, and after perusing the menu and seeing items like "French Toast S'mores" and "Crispy Creole Crabcake" as options, it was hard to not run to the cutesy chocolate lounge.
 Both Sarah and I ordered the Onyx, a vanilla creme brulee encased in dark chocolate mousse with salted caramel on top, basically chocolate overload. The mousse was perfectly smooth and the creme brulee did an excellent job of preventing us from going into a chocolate overdose. Gina ordered the Stolen Heart, which was a white chocolate strawberry mousse with chocolate crispy pearls; naturally, all of these desserts found their way into our already fulls selves. We barely ate the rest of the day.
Co Co. Sala is a great place for brunch or dessert, they also offer dinner too (don't worry, not everything has chocolate in it!). Although some of the items are a little pricey, the brunch was definitely worth the commute and price. The presentation on each dish was flawless, and the overall tastes definitely give Co Co. Sala an edge over other restaurant's desserts. While I would definitely order the French Toast S'mores again, the Breakfast Flatbread looked like a pretty great savory option also. I may pass on the mousse though and opt for the PB Cheesecake instead, but that may have just been because I was coming out of a food coma from the french toast. This restaurant is great for dessert and drinks out with the girls (they offer a variety of cocktails and hot cocoas) or for a date. Either way you'll swoon for the flavors Co Co. Sala offers. They also have a "Chocolate Boutique" in case you was a box of chocolates to take home!

MENU
929 F STREET NW,
WASHINGTON, DC 20004
P 202.347.4265
Transport:
1. g'town ->union station circulator, get off at about K st. and 11th, walk to F and 10th
2. Any train to Metro Center, walk to F and 10th
Friday, January 14, 2011
It's all about the Dough! Pre-baking cookie process
Hey Nomsters!

As promised, I'm back with my method (along with many other people's) of the cookie making process that leads up to the actual baking. When I was a kid, I always got excited for certain holidays because I knew Pillsbury would be selling their seasonal sugar cookies in supermarkets! If you don't know which cookies I'm referencing, they're the ones that come with little shapes artificially dyed on them, like Easter Bunny's, Heats, and Snowmen. Besides the cute little pictures on the cookies and the fact that I loved sneaking pieces of the raw cookie dough, the softness and chewiness of these little morsels were soooo good after they'd been baked. So, if you're partial to a softer, chubbier, cookies, this method of "prepping the dough" should be just what you're looking for when you bake your next batch of cookies.
I've always liked my cookies chewy and sort of plump, which never seemed to happen when I first started baking. The first couple of Snickerdoodle cookie batches always seemed to spread out too much on the cookie sheet, yielding a yummy, but somewhat flat treat. So, I started experimenting, I changed the amount of flour, added a bit more baking powder/soda, or tried to not mix them too much, and while these changes resulted in more favorable cookies, it wasn't until I started freezing or putting my dough in the fridge overnight that I really got the results I wanted! Moist, chewy, little cookies. If you're looking for cookies like I've describe, follow the instructions below and see if you like the results. I think the main pro from chilling he dough before baking the cookies is that the butter in the mixture hardens, which makes the cookies spread slowly on the sheet rather than melt down within 5 minutes.

Basics for a Chewy, "Chubby," Cookie
Disclaimer, if you don't want to "roll" your cookies before you place them in the freezer, you can always just freeze them and roll prior to baking.
-Make your dough (I've found that unless you're working with a finicky recipe, most cookie doughs respond well to chilling)
-Transfer you dough from the mixing bowl to a Tupperware container or another bowl that has been lined with saran wrap so that the edges hang over
-Use the saran wrap to cover the top of the dough and store in the fridge for a couple of hours
-Once dough is firm enough that it doesn't mush all over your hands, start rolling desired size balls of dough and place them in another container (you can layer your dough by rolling enough balls to fit into a container then layer wax paper on top and repeat,
-Place rolled dough in freezer for an hour to harden,
-Take rolled dough out, space out on cookie sheet and bake until golden on the edges!
While, I know this seems like a long process, it's worth it for the consistency of cookie. However, if you want a shorter method, just chilling the dough in the freezer or fridge for a few hours/overnight will give you a similar consistency!
Good luck and Enjoy!
-Georgetown Foodie

As promised, I'm back with my method (along with many other people's) of the cookie making process that leads up to the actual baking. When I was a kid, I always got excited for certain holidays because I knew Pillsbury would be selling their seasonal sugar cookies in supermarkets! If you don't know which cookies I'm referencing, they're the ones that come with little shapes artificially dyed on them, like Easter Bunny's, Heats, and Snowmen. Besides the cute little pictures on the cookies and the fact that I loved sneaking pieces of the raw cookie dough, the softness and chewiness of these little morsels were soooo good after they'd been baked. So, if you're partial to a softer, chubbier, cookies, this method of "prepping the dough" should be just what you're looking for when you bake your next batch of cookies.
I've always liked my cookies chewy and sort of plump, which never seemed to happen when I first started baking. The first couple of Snickerdoodle cookie batches always seemed to spread out too much on the cookie sheet, yielding a yummy, but somewhat flat treat. So, I started experimenting, I changed the amount of flour, added a bit more baking powder/soda, or tried to not mix them too much, and while these changes resulted in more favorable cookies, it wasn't until I started freezing or putting my dough in the fridge overnight that I really got the results I wanted! Moist, chewy, little cookies. If you're looking for cookies like I've describe, follow the instructions below and see if you like the results. I think the main pro from chilling he dough before baking the cookies is that the butter in the mixture hardens, which makes the cookies spread slowly on the sheet rather than melt down within 5 minutes.

Basics for a Chewy, "Chubby," Cookie
Disclaimer, if you don't want to "roll" your cookies before you place them in the freezer, you can always just freeze them and roll prior to baking.
-Make your dough (I've found that unless you're working with a finicky recipe, most cookie doughs respond well to chilling)
 |
| Post Fridge Roll, Pre Freezer |
-Transfer you dough from the mixing bowl to a Tupperware container or another bowl that has been lined with saran wrap so that the edges hang over
-Use the saran wrap to cover the top of the dough and store in the fridge for a couple of hours
-Once dough is firm enough that it doesn't mush all over your hands, start rolling desired size balls of dough and place them in another container (you can layer your dough by rolling enough balls to fit into a container then layer wax paper on top and repeat,
-Place rolled dough in freezer for an hour to harden,
 |
| rolled and frozen layered atop each other |
While, I know this seems like a long process, it's worth it for the consistency of cookie. However, if you want a shorter method, just chilling the dough in the freezer or fridge for a few hours/overnight will give you a similar consistency!
 |
| after rolling and freezing |
 |
| end result! |
Good luck and Enjoy!
-Georgetown Foodie
Sunday, January 2, 2011
Mission Accomplished: Chocolate Peppermint Cookies and Snickerdoodles
Hello Nomsters,
Happy New Year! Hopefully everyone's enjoyed the holiday season and has been ringing in 2011. Regardless of my unpunctual post, I did in fact manage to successfully carry out the Cookie Challenge. I opted to make two different kinds of cookies, the Chocolate Peppermint Cookies (which some of you had the chance to order) and straight up Snickerdoodles. After a morning of present opening and Christmas cooking, I spent my afternoon and evening rolling and baking the cookie dough that I had made the previous night. Spending an afternoon running back and forth from the oven with cookie sheets, I was happy to finally see over six dozen cookies all lined up on my counter. The final touch was packaging. I went and bought little clear bags from Target (in the gift wrap isle) and used typical present wrapping ribbon to add a personal touch to the cookies. The recipe for Chocolate Peppermint Cookies is included and pictures are floating around throughout this post.
Enjoy and look out for more posts and updates on 2011 here soon!
All the best!
The Georgetown Foodie

Chocolate Peppermint Cookies (anywhere from 2 dozen (lrg) to 4 dozen (small/med) cookies)
Ingredients:
-1 3/4 cups all-purpose flour
-3/4 cup cocoa powder
-2 tsp baking powder
-1 tsp salt
-12 ounces semi sweet chocolate (that's one bag of Toll House Chocolate Chip)
-1/4-1/2 package of Herseys' candy cane kisses (optional, basically any mint chocolate can be used, but the candy cane kisses are a nice touch because the cookies end up having specs of red)
-4 large eggs
-1 Tbsp vanilla extract
-1/2 tsp peppermint extract
-1 1/2 sticks unsalted butter (or salted) at room temperature
 -1 or 2 Tbsp butter (to be used when double boiling)
-1 1/2 cup packed brown sugar (I used dark, because that's what I usually had in my pantry)
-1/2 cup granulated sugar
For the pink chocolate ribbon:
-1/3 to 1/2 (about 10-20 kisses)
-Microwave
Process:
Cookies:
*Preheat oven to 350f. Line 2 sheet pans with parchment.
-Combine the flour, cocoa, and baking powder in a bowl and set aside.
-Cream the butter for about 1 minute, add the white and brown sugars and mix well on medium. Add the eggs, one at a time, mixing after each to incorporate. Mix in the vanilla extract and peppermint extract
-Double boil to melt the chocolates and then let cool down for about 5 minutes.
-Add the chocolate in a stream and mix well.
-Mix in the dry mixture (flour, salt, etc) and mix until the flour just disappears.
-Allow the batter to sit for about 20 minutes if you plan to bake straight away; however, I like my cookies to be chewy and "chubby," therefore I often transfer the dough to Tupperware that has been lined with saran wrap, and place it in the fridge overnight. If you want to follow my method exactly, see the "Cookie Note" I post in the next day about freezing/rolling cookies.
-If you choose to make the cookies directly after waiting 20mins, then scoop out the batter with a spoon or a small cookie scoop leaving about an inch between each cookie. If you plan to roll cookies, then let sit in fridge until firm and use a a spoon to get chucks that can be rolled into balls for baking.
-Bake for about 10 minutes (or until cookies are slightly cracked on top), let cool on the sheet pan for 10 minutes, and then remove from the tray and finish cooling on a rack.
Pink Chocolate Ribbon:
-melt down kisses using a small bowl and microwaving in about 20 secon intervals, stirring after each. As the kisses get hotter and melt, they'll help other kisses melt also.
-use a spoon to dab lines back and forth across cookie. Starting at the top of a cookie, dab a bit of chocolate and then stretch to other side of cookie and dab once more. Continue this process until cookie is covered in desired design.
The Double Boil Method:
Basically, this is the best way to melt chocolate. If there's one thing you need to know about melting chocolate, it's that WATER IS YOUR ENEMY.... hands down, most important rule. Well, that and make sure you don't over cook the chocolate. When in doubt, just melt until almost all is melted, because at that point the heat from the melted chocolate will take care of the rest.
1. Use either two pots or a bowl and a pot and place the smaller on top of the other, fill the bottom pot with enough water to maintain a steady boil, but not too much that it could risk boiling over.
2. Turn on the flame to low/medium, add part of your chocolate and the butter. (I feel as though the butter helps keep the chocolate moist while it melts; however, in most cases of melting chocolate butter is necessary, so you can decide whether to add it or not.).
3. Keep stirring chocolate to help distribute heat evenly, and continue adding chocolate as melt process continues.
4. Continue stirring mixture on and off until chocolate melts, then let cool until ready to combine with other mixture/batter.
 |
| Wrapped Up and Ready to Go! |
Happy New Year! Hopefully everyone's enjoyed the holiday season and has been ringing in 2011. Regardless of my unpunctual post, I did in fact manage to successfully carry out the Cookie Challenge. I opted to make two different kinds of cookies, the Chocolate Peppermint Cookies (which some of you had the chance to order) and straight up Snickerdoodles. After a morning of present opening and Christmas cooking, I spent my afternoon and evening rolling and baking the cookie dough that I had made the previous night. Spending an afternoon running back and forth from the oven with cookie sheets, I was happy to finally see over six dozen cookies all lined up on my counter. The final touch was packaging. I went and bought little clear bags from Target (in the gift wrap isle) and used typical present wrapping ribbon to add a personal touch to the cookies. The recipe for Chocolate Peppermint Cookies is included and pictures are floating around throughout this post.
Enjoy and look out for more posts and updates on 2011 here soon!
All the best!
The Georgetown Foodie

Chocolate Peppermint Cookies (anywhere from 2 dozen (lrg) to 4 dozen (small/med) cookies)
Ingredients:
-1 3/4 cups all-purpose flour
-3/4 cup cocoa powder
-2 tsp baking powder
-1 tsp salt
-12 ounces semi sweet chocolate (that's one bag of Toll House Chocolate Chip)
-1/4-1/2 package of Herseys' candy cane kisses (optional, basically any mint chocolate can be used, but the candy cane kisses are a nice touch because the cookies end up having specs of red)
-4 large eggs
-1 Tbsp vanilla extract
-1/2 tsp peppermint extract
-1 1/2 sticks unsalted butter (or salted) at room temperature
 -1 or 2 Tbsp butter (to be used when double boiling)
-1 1/2 cup packed brown sugar (I used dark, because that's what I usually had in my pantry)
-1/2 cup granulated sugar
For the pink chocolate ribbon:
-1/3 to 1/2 (about 10-20 kisses)
-Microwave
Process:
Cookies:
*Preheat oven to 350f. Line 2 sheet pans with parchment.
-Combine the flour, cocoa, and baking powder in a bowl and set aside.
-Cream the butter for about 1 minute, add the white and brown sugars and mix well on medium. Add the eggs, one at a time, mixing after each to incorporate. Mix in the vanilla extract and peppermint extract
-Double boil to melt the chocolates and then let cool down for about 5 minutes.
-Add the chocolate in a stream and mix well.
-Mix in the dry mixture (flour, salt, etc) and mix until the flour just disappears.
-Allow the batter to sit for about 20 minutes if you plan to bake straight away; however, I like my cookies to be chewy and "chubby," therefore I often transfer the dough to Tupperware that has been lined with saran wrap, and place it in the fridge overnight. If you want to follow my method exactly, see the "Cookie Note" I post in the next day about freezing/rolling cookies.
-If you choose to make the cookies directly after waiting 20mins, then scoop out the batter with a spoon or a small cookie scoop leaving about an inch between each cookie. If you plan to roll cookies, then let sit in fridge until firm and use a a spoon to get chucks that can be rolled into balls for baking.
-Bake for about 10 minutes (or until cookies are slightly cracked on top), let cool on the sheet pan for 10 minutes, and then remove from the tray and finish cooling on a rack.
 |
| Chocolate Peppermint Cookies |
-melt down kisses using a small bowl and microwaving in about 20 secon intervals, stirring after each. As the kisses get hotter and melt, they'll help other kisses melt also.
-use a spoon to dab lines back and forth across cookie. Starting at the top of a cookie, dab a bit of chocolate and then stretch to other side of cookie and dab once more. Continue this process until cookie is covered in desired design.
 |
| All Rolled Up (Chocolate Peppermint Cookies) |
 |
| Snickerdooles |
 |
| Getting ready for the freezer |
The Double Boil Method:
Basically, this is the best way to melt chocolate. If there's one thing you need to know about melting chocolate, it's that WATER IS YOUR ENEMY.... hands down, most important rule. Well, that and make sure you don't over cook the chocolate. When in doubt, just melt until almost all is melted, because at that point the heat from the melted chocolate will take care of the rest.
1. Use either two pots or a bowl and a pot and place the smaller on top of the other, fill the bottom pot with enough water to maintain a steady boil, but not too much that it could risk boiling over.
2. Turn on the flame to low/medium, add part of your chocolate and the butter. (I feel as though the butter helps keep the chocolate moist while it melts; however, in most cases of melting chocolate butter is necessary, so you can decide whether to add it or not.).
3. Keep stirring chocolate to help distribute heat evenly, and continue adding chocolate as melt process continues.
4. Continue stirring mixture on and off until chocolate melts, then let cool until ready to combine with other mixture/batter.
 |
| Snickerdoodles |
 |
| The Line Up |
Friday, December 24, 2010
Tis the Season! The Cookie Challenge
 |
| Peppermint Sandwich Cookie |
It's obviously been a while since my last post, which I must apologize for, no excuse, but maybe I can tempt you with some yummy cookie recipes that are to come!
 |
| Mom's English Trifle |
 |
| Chocolate Peppermint Cookie |
Stay tuned!
-GF
Tuesday, November 23, 2010
Simple Recipes and Common Sense: Pumpkin Whoopie Pies
Hello Nomsters,
 Happy Thanksgiving break! Of course I'm sure most of you are making the journey home or to some other location to celebrate one of the biggest foodie holidays! As we all await either the traditional turkey, stuffing, sweet potatoes, veggies (the list goes on!) or we get ready to enjoy a tasty dinner out, I figured I would provide you with a new twist on the typical Thanksgiving dessert. Now, this by no means needs to replace pumpkin, sweet potato, or pecan pie, but they are a nice accompaniment to any Thanksgiving food fest!
As promised, I have provided a recipe for Pumpkin Whoopie Pies (with Cream Cheese Frosting) at the end of this post. I made these tasty treats for the first time last week to test them out on some friends at a Thanksgiving party and boy, they did not disappoint! The cake part is a bit moist, but I solved that problem by putting then in the fridge for a bit after assembling them
Pumpkin Spice Cake:
1/2 cup (1 stick) butter, melted
1 cup brown sugar (light or dark brown works)
2 large eggs at room temperature
1 cup canned pumpkin puree (if you don't have enough pumpkin, you can use banana as a nice twist, it gives the cake a nice dimension)
2 tsp. pumpkin pie spice
1 tsp. cinnamon
1 tsp. vanilla
1 tsp. baking powder
1 tsp. baking soda
3/4 tsp. salt
1 and 2/3 cup all purpose flour
-Pre-heat oven to 350 degrees.
-Melt the butter in the microwave for about 30 seconds, make sure to check on it in 10sec intervals in order to avoid burnt butter,
-Sift dry ingredients together and set aside. Beat butter and sugar until smooth. Add eggs, pumpkin, vanilla and mix well. Add the dry ingredients to the pumpkin mixture and mix just until combined.
-Drop in similar sized spoonfuls onto a cookie sheet and bake for about 8-12mins, until they look and feel like spongy cookies.
-Let them completely cool down before attempting to assemble them.
 Cream Cheese Frosting:
1/2 stick of butter (softened)
1 8ox package of cream cheese (softened)
1 box of confectioners (powdered) sugar
1 tsp vanilla
(if you have a mixer)
-Cream butter and cream cheese together,
-Add vanilla and mix on low,
-Gradually add confectioner's sugar, making sure to scrape down the sides
(without mixer, prepare to work those wrists)
-Cream butter and cream cheese together with a fork or wooden spoon (this will take a while, so really wait for those ingredients to soften)
-Add vanilla and mix well,
-Add the confectioner's sugar and make sure to mix it really well until it reaches a smooth consistency.
Assembly:
-Take one pumpkin cookie, spoon cream cheese frosting and spread thickly over the surface, add the other half and gently squeeze so that the icing pops out just a little!
Happy Thanksgiving!
-gf

As promised, I have provided a recipe for Pumpkin Whoopie Pies (with Cream Cheese Frosting) at the end of this post. I made these tasty treats for the first time last week to test them out on some friends at a Thanksgiving party and boy, they did not disappoint! The cake part is a bit moist, but I solved that problem by putting then in the fridge for a bit after assembling them
Pumpkin Spice Cake:
1/2 cup (1 stick) butter, melted
1 cup brown sugar (light or dark brown works)
2 large eggs at room temperature
1 cup canned pumpkin puree (if you don't have enough pumpkin, you can use banana as a nice twist, it gives the cake a nice dimension)
2 tsp. pumpkin pie spice
1 tsp. cinnamon
1 tsp. vanilla
1 tsp. baking powder
1 tsp. baking soda
3/4 tsp. salt
1 and 2/3 cup all purpose flour
-Pre-heat oven to 350 degrees.
-Melt the butter in the microwave for about 30 seconds, make sure to check on it in 10sec intervals in order to avoid burnt butter,
-Sift dry ingredients together and set aside. Beat butter and sugar until smooth. Add eggs, pumpkin, vanilla and mix well. Add the dry ingredients to the pumpkin mixture and mix just until combined.
-Drop in similar sized spoonfuls onto a cookie sheet and bake for about 8-12mins, until they look and feel like spongy cookies.
-Let them completely cool down before attempting to assemble them.
 Cream Cheese Frosting:
 1/2 stick of butter (softened)
1 8ox package of cream cheese (softened)
1 box of confectioners (powdered) sugar
1 tsp vanilla
(if you have a mixer)
-Cream butter and cream cheese together,
-Add vanilla and mix on low,
-Gradually add confectioner's sugar, making sure to scrape down the sides
(without mixer, prepare to work those wrists)
-Cream butter and cream cheese together with a fork or wooden spoon (this will take a while, so really wait for those ingredients to soften)
-Add vanilla and mix well,
-Add the confectioner's sugar and make sure to mix it really well until it reaches a smooth consistency.
Assembly:
-Take one pumpkin cookie, spoon cream cheese frosting and spread thickly over the surface, add the other half and gently squeeze so that the icing pops out just a little!
Happy Thanksgiving!
-gf
Sunday, November 7, 2010
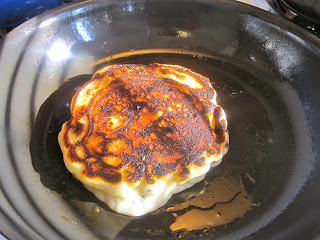
Simple Recipes and Common Sense: Banana Chocolate Chip Pancakes
Hello Nomsters!
Happy November, I know we've been slacking on our blog updates, but with midterms, crazy rallies, and the return of the "McRib" things have been a bit busy.... and for the record, I was kidding about the last reason. Anyway, hopefully everyone is having a splendid Sunday, and to make things just a bit sweeter, here's a recipe for some of the best pancakes ever!
 I first tasted this recipe at a family friend's house in New Haven, CT. She had planned on making pancakes, but realized that she didn't have any buttermilk. However, in true foodie fashion, she used yogurt as a substitution. The result was a thick, blueberry-packed pancake that just melts in your mouth. These results were most likely due to the yogurt substitution and the amount of baking powder in the recipe. Ever since I've been playing around with the recipe and different ingredients, but the blueberry are still amazing, especially since when my family makes them we make a compote to accompany the yummy cakes.
I usually make the original blueberry, but this week I opted for bananas/chocolate chip with maple syrup, which yielded delicious results. So if you're in college and haven't already grabbed brunch or are looking for a delicious meal for your family, try your hand at these tasty pancakes.
1 ⅓ cups Flour
3 Tbsp Sugar
2 ½ tsp Baking Powder

 ¾ tsp Salt
1 ¼ cups Vanilla Yogurt
2 large Eggs
¼ stick Unsalted Butter, melted
2-3 bananas cut into small pieces
As many chocolate chips as you want!
Maple Syrup, for serving
-Whisk yogurt, eggs, and 2 Tbsp. butter in medium bowl; stir in dry ingredients,
-Fold in bananas and chocolate chips,
-Heat large nonstick griddle or skillet over medium hear; brush with butter,
-Drop batter by ⅓ cupfuls onto griddle,
-Cook pancakes until brown, brushing griddle with more butter as needed, about 3 minutes per side,
-Transfer to sheet in over to keep warm. Serve pancakes with maple syrup!
I highly recommend this recipe! The overall process is pretty easy, and the results are amazing, thick, fluffy, pancakes that will have you begging for another.
 Also, in delivery news, we'll be tabling in red square soon, and this week's menu offerings are Cinnamon Brown Sugar Muffins and Chocolate Chip Cookies!
Keep on nomming!
-GF
Happy November, I know we've been slacking on our blog updates, but with midterms, crazy rallies, and the return of the "McRib" things have been a bit busy.... and for the record, I was kidding about the last reason. Anyway, hopefully everyone is having a splendid Sunday, and to make things just a bit sweeter, here's a recipe for some of the best pancakes ever!
 I first tasted this recipe at a family friend's house in New Haven, CT. She had planned on making pancakes, but realized that she didn't have any buttermilk. However, in true foodie fashion, she used yogurt as a substitution. The result was a thick, blueberry-packed pancake that just melts in your mouth. These results were most likely due to the yogurt substitution and the amount of baking powder in the recipe. Ever since I've been playing around with the recipe and different ingredients, but the blueberry are still amazing, especially since when my family makes them we make a compote to accompany the yummy cakes.
I usually make the original blueberry, but this week I opted for bananas/chocolate chip with maple syrup, which yielded delicious results. So if you're in college and haven't already grabbed brunch or are looking for a delicious meal for your family, try your hand at these tasty pancakes.
Banana Chocolate Chip Pancakes
Ingredients: 1 ⅓ cups Flour
3 Tbsp Sugar
2 ½ tsp Baking Powder

 ¾ tsp Salt
1 ¼ cups Vanilla Yogurt
2 large Eggs
¼ stick Unsalted Butter, melted
2-3 bananas cut into small pieces
As many chocolate chips as you want!
Maple Syrup, for serving
Instructions:
-Whisk first 4 ingredients in a large bowl,-Whisk yogurt, eggs, and 2 Tbsp. butter in medium bowl; stir in dry ingredients,
-Fold in bananas and chocolate chips,
-Heat large nonstick griddle or skillet over medium hear; brush with butter,
-Drop batter by ⅓ cupfuls onto griddle,
-Cook pancakes until brown, brushing griddle with more butter as needed, about 3 minutes per side,
-Transfer to sheet in over to keep warm. Serve pancakes with maple syrup!
I highly recommend this recipe! The overall process is pretty easy, and the results are amazing, thick, fluffy, pancakes that will have you begging for another.

Keep on nomming!
-GF
Subscribe to:
Posts (Atom)